Chạy câu lệnh sau để update các thư viện mới nhất
$ sudo apt update
$ sudo apt upgrade
Đảm bảo đã cài git cli bằng câu lệnh
$ sudo apt-get install gitTải file script về bằng cách clone từ github:
$ git clone https://github.com/Nyr/openvpn-install.gitVào trong thư mục openvpn-install vừa clone về, bạn sẽ thấy file openvpn-install.sh là file cài đặt openvpn, bao gồm các câu lệnh đã được chuẩn bị sẵn.
Thêm quyền thực thi và chạy file này:
$ chmod +x openvpn-install.sh
$ sudo ./openvpn-install.sh
Thiết lập các giá trị binding IP, port, dns, client cert khi được yêu cầu:
Welcome to this OpenVPN "road warrior" installer!

I need to ask you a few questions before starting the setup.
You can leave the default options and just press enter if you are ok with them.

First, provide the IPv4 address of the network interface you want OpenVPN
listening to.
IP address: 192.168.10.2

Which protocol do you want for OpenVPN connections?
1) UDP (recommended)
2) TCP
Protocol [1-2]: 1

What port do you want OpenVPN listening to?
Port: 1192

Which DNS do you want to use with the VPN?
1) Current system resolvers
2) 1.1.1.1
3) Google
4) OpenDNS
5) Verisign
DNS [1-5]: 1

Finally, tell me your name for the client certificate.
Please, use one word only, no special characters.
Client name: client

Okay, that was all I needed. We are ready to set up your OpenVPN server now.
Press any key to continue... <Enter>
Nếu cài đặt thành công, bạn sẽ thấy kết quả như sau:
sing configuration from ./openssl-easyrsa.cnf
Check that the request matches the signature
Signature ok
The Subject's Distinguished Name is as follows
commonName            :ASN.1 12:'client'
Certificate is to be certified until Jul  4 07:53:27 2028 GMT (3650 days)

Write out database with 1 new entries
Data Base Updated
Using configuration from ./openssl-easyrsa.cnf

An updated CRL has been created.
CRL file: /etc/openvpn/easy-rsa/pki/crl.pem

394

Finished!

Your client configuration is available at: /root/client.ovpn
If you want to add more clients, you simply need to run this script again!
File config chính của openvpn server là /etc/openvpn/server.conf chúng ta có thể chỉnh sửa các tham số cấu hình trong file này nếu cần.
Bước cuối cùng là generate file profile cho user để có thể kết nối vào vpn server, chúng ta vẫn chạy file openvpn-install.sh
$ sudo ./openvpn-install.sh

Looks like OpenVPN is already installed.

What do you want to do?
   1) Add a new user
   2) Revoke an existing user
   3) Remove OpenVPN
   4) Exit
Select an option [1-4]: 1

Tell me a name for the client certificate.
Please, use one word only, no special characters.
Client name: duc.nguyen
Generating a 2048 bit RSA private key
...+++
.............................................................................................................................+++
writing new private key to '/etc/openvpn/easy-rsa/pki/private/duc.nguyen.key.8dsSsOTWPe'
-----
Using configuration from ./openssl-easyrsa.cnf
Check that the request matches the signature
Signature ok
The Subject's Distinguished Name is as follows
commonName            :ASN.1 12:'duc.nguyen'
Certificate is to be certified until Jul  4 08:10:32 2028 GMT (3650 days)

Write out database with 1 new entries
Data Base Updated

Client duc.nguyen added, configuration is available at: /root/duc.nguyen.ovpn
chúng ta sẽ copy file /root/duc.nguyen.ovpn vào máy client để có thể kết nối vào vpn server.
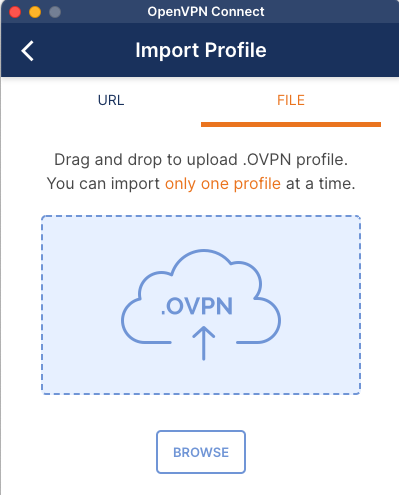
Ở phía client, chúng ta cần cài đặt openvpn connect, download tại https://openvpn.net/vpn-client/. Sau khi cài đặt, chúng ta import profile duc.nguyen.ovpn